SMILE – It’s Your Birthday

Hi everyone. I’m back with a new card for you today – well not really a new card. I made this card a few months ago and life happened before I was able to post this. So here I am today sharing this card.

Here is the card —

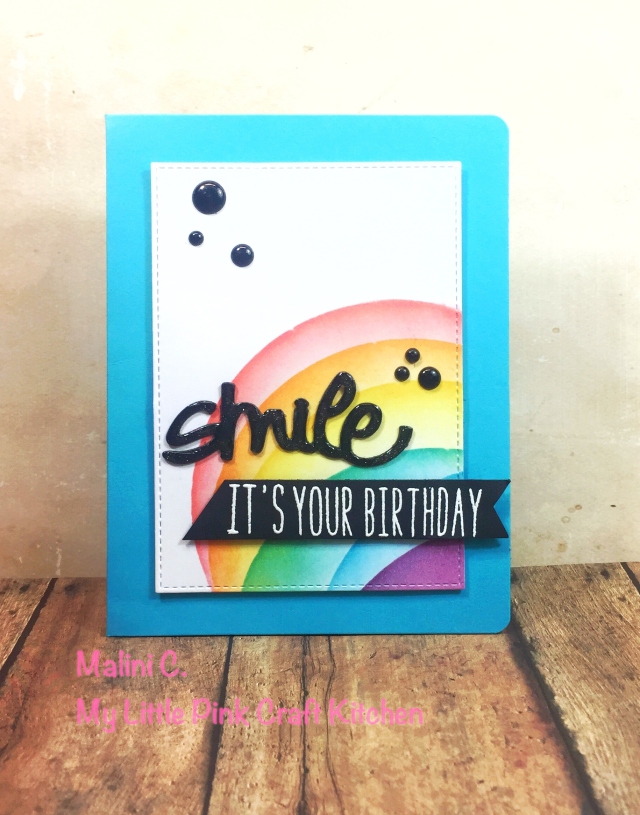
Smile Its Your Birthday

I started this card with a card base from Core’dinations. I cut the largest rectangle from the MFT Stitched Rectangle Stax from Neenah Solar White card stock. I created a circle template and colored it in using different colors of Tim Holtz Distress inks to create a rainbow ink blended effect.

For the sentiment, I cut the smile die cut from Little Yellow Bicycle from Bazzil Black Licorice card stock. To make it look like an embellishment, I added some Wink of Stella to the entire word and then finished it off with Glossy Accents. After it dried, it looked like an enamel accent which I really liked. I will definitely do that more often. For the second sentiment, I spelled out the words using Lawn Fawn’s Milo’s ABC and embossed it with white embossing powder on black card stock.

To finish the card, I added some black enamel dots from My Mind’s Eye to give it a finished look.

That’s it for this card.

I really feel productive and hopefully this continues until next year. Four months in a craft funk is no joke. I’m pretty excited to be creating again – stress free.

For a full list of products and tools I used, please check the supply list below: (InLinkz to follow)

  1. Core’dinations Bright Smooth A2 cards and envelopes (blue)
  2. Neenah Solar White card stock 80 lb
  3. Bazzill Black Licorice card stock
  4. My Favorite Things Stitched Rectangle Stax
  5. Little Yellow Bicycle “Smile” die
  6. Lawn Fawn Milo’s ABC
  7. Tim Holtz Distress Ink (in rainbow order) – Fired Brick, Spiced Marmalade, Mustard Seed, Peacock Feathers, Mermaid Lagoon, Seedless Preserves.
  8. American Crafts Zing white embossing powder
  9. Clear Wink of Stella pen
  10. Glossy Accents
  11. My Mind’s Eye Charmed black enamel dots
  12. Tombow tape runner
  13. Scotch foam tape


I Only Have Eyes For You

Hi everyone!

Today I’m sharing a card for the Create A Smile March Guest Designer Call.

Guest Designer Call

The guest call will run until February 13 so if you’re interested, go and check it out here.

For this card, I decided to use one of the freebies they have on their website. Here is my card —

IMG_5084

Recently I have been enjoying using digital stamps. I used a Newton’s Nook freebie and I purchased some from Gerda Steiner and now I’m using another freebie from Create A Smile. I will always love clear stamps and I will never stop using them, but digi’s are pretty cool to use once in a while.

I started this card with a panel of Neenah Solar White card stock that measures 5 x 3 3/4 inches. I wanted to color some embossing paste so I used Audrey Blue and Doll Pink from Simon Says Stamp to color some white embossing paste from Wendy Vecchi. I used a chevron stencil from Heidi Swapp and did alternate colors of the paste.

For the focal panel, I cut the image from the Lawn Fawn Stitched Journaling card but I wanted the top to have a straight edge but still keep the stitched detail – so I used the straight border die from the Stitched Borders 2 from Pretty Pink Posh to cut the top part.

I colored the bird with some Copic markers. I will mention the colors in the supply list below. For the sentiment, I was struck with the bird’s big eyes so I wanted to use a puny sentiment related to that. I stamped the sentiment from the Only Have Eyes for you set from Simon Says Stamp with Versafine Onyx black ink and embossed it with clear embossing powder.

To finish the card, I adhered the stitched panel to the chevron piece and I adhered the chevron panel to a standard size card from Neenah Solar White. I also added  Glossy Accents to the eyes of the bird and his stomach. I used enamel dots from My Mind’s Eye to tie in all the colors together.

That’s it for this card.

For a complete list of all the products and tools I used, please check the supply list below.

Thanks for reading.

SUPPLY LIST

I Hit The Bulls Eye

Hi everyone! I’m here with a card for the Lawnscaping Challenge over the Lawnscaping blog. The theme for the challenge this week is “Stars and Stripes”.

84

I know that the theme is geared towards more patriotic cards but I really had fun using the striped patterned papers includined the Hello Sunshine 6×6 paper pack from Lawn Fawn. So that was the route I took.

Here is my card —


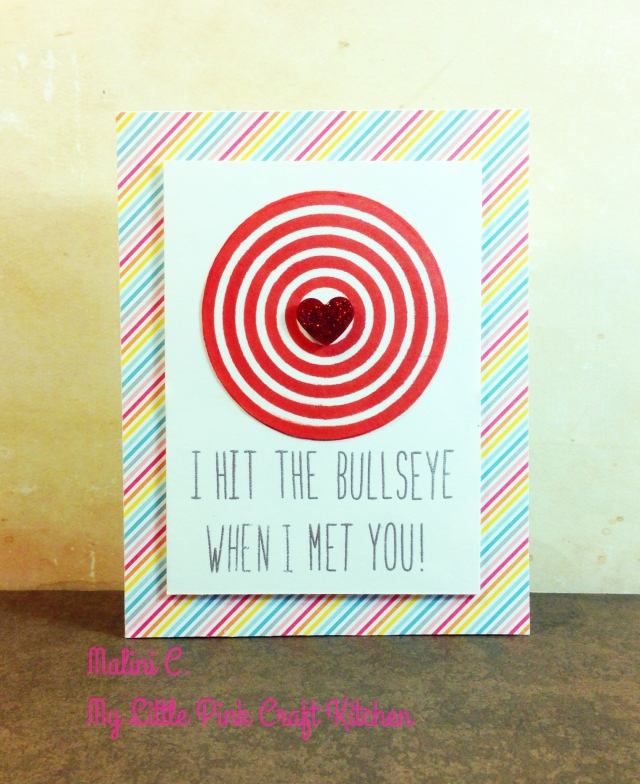
I Hit The BullsEye


I started this card with some Neenah Solar White card stock cut to a standard size card. I adhered the front completely with the rainbow striped patterned paper from Lawn Fawn’s Hello Sunshine 6×6 paper pad. For the front panel, I used the rainbow stencil from Simon Says Stamp and colored it in with the some SSS Lipstick Red ink using a mini sponge dauber. When the top part of the rainbow was finished, I inverted the stencil and colored the rainbow again – meeting both edges to form a target.

For the sentiment, I used LF’s Milo’s ABC. I am in love with this alphabet set. I think its very versatile and I love the thin and tall letters. I created my own sentiment to match the target. I stamped it with VersaMark ink and embossed it using Zing Silver Metallic embossing powder.

To finish the card, I colored a small part of the card stock with the Lipstick Red ink and punched out a small heart. I covered the heart in red glitter and topped it off with Glossy Accents to seal the glitter and I attached with with foam adhesive at the center of the bulls eye.


SSS January Kit Card #3 – Heart Speech Bubble

Hi everyone! I’m here today with my 3rd card for the Simon Says Stamp Monthly Card Kit. This card will be an entry for the Retro Sketches Challenge #97  over at their blog. Here is the sketch I used as inspiration.

rs97

Here is my card using the supplies from the Simon Says Stamp January card kit —

Heart Speech Bubble

I started this card with some Marshmallow card stock from Bazzill cut to a standard size landscape card. I adhered the triangular patterned paper from Fancy Pants included in the kit on the entire front of the card. I then adhered a 2 1/2 by 5 1/2 piece of vellum towards the bottom of the card so that the pattern paper underneath would have a sheer effect. Looking at the sketch above, the sheer effect of the vellum was what I wanted to be the cut. But because it was too sheer and barely noticeable, I decided to place a strip of patterned paper from the same collection to accentuate where the vellum begins.

I die cut the second to the smallest frame from the Sizzix Fancy Labels #3 from more Bazzill Marshmallow card stock and I placed the monster image at the center with foam squares. I stamped the monster on pink patterned paper with a chevron detail from the Fancy Pants paper included in the kit. I paper pieced the mouth and eyes on white card stock and glued it to the image. I placed the speech bubble  paperclip as if the monster was saying something like I love you since it was a heart. To finish of the  card, I placed some clear diamond gems from Hero Arts and some pink gems from Hampton Art in random places for added interest.

That’s it for this card. I will try and make at least 2 more cards from this before the month is over. Thanks for reading! 🙂