Thanks For Being There

Hi everyone! I’m here with a new card for a few challenge blogs. I will link and mention these challenges at the end of the post.

If you read my previous post about starting to make cards again, I promised myself that I will not buy anything new until I can follow through cardmaking for at least a month. So for this card, I used stamps from Lawn Fawn and Simon Says Stamp that are oldies but goodies.
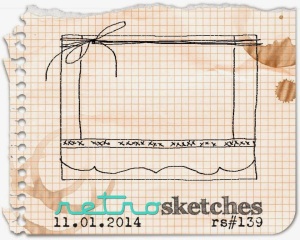
Here is my card —

I started this card with Neenah Solar White cardstock and stamped the images from Lawn Fawn’s Critters in the Forest using Versafine Onyx Black Ink. To color the images, I used Prismacolor pencils and blended the different colors with an odorless mineral spirit and a paper stump. I blended some Surf Blue ink from Simon Says Stamp around the image to give it some depth. I used the Stitched Borders 2 from Pretty Pink Posh to cut the panel diagonally.

For the card base, I used a standard size Neenah Solar White cardstock. I adhered the sequins patterned paper from Doodlebug and Simple Stories from an old SSS Card Kit.

For the sentiment, I die cut the thanks die from a textured gray card stock (I don’t know the exact name) from Neenah. I layered 4 pieces to get some dimension and from the matching stamp set, I stamped a sentiment on a thin strip with Versamark ink and embossed it with the American Crafts Zing white embossing powder.

I am entering this card for the following challenges –

Simon Says Stamp Wednesday Challenge – use patterned paper


Freshly Made Sketches – Sketch #293 

The Paper Players Challenge – using our Feathered Friends

For information on the the tools and products I used for this card, please check the supply list below:

SUPPY LIST:

  1. Neenah Solar White card stock
  2. Neenah Textured card stock – gray
  3. Doodlebug/Simple Stories 6×6 patterned paper
  4. Lawn Fawn Critters in the Forest
  5. Simon Says Stamp Thanks stamp set and coordinating die
  6. Versafine Onyx Black ink
  7. Simon Says Stamp Surf Blue ink
  8. Versamark ink
  9. American Crafts Zing white embossing powder
  10. Prismacolor coloring pencils
  11. Masterpiece Odorless Mineral Spirit
  12. The Paper Studio paper stump
  13. Post it paper for masking
  14. Elmer’s Glue Dot Runner
  15. Scotch Foam tape
  16. Ranger Multi Matte Medium glue

That’s it for this card. Thank you for reading. See you in my my next post.


12 Days of Christmas Cards Day 1 – Happy Holidays!

12 Days of Christmas


Hi everyone! Welcome to Day 1 of my 12 Days of Christmas Cards. In case you missed the previous post, I have a giveaway that will stay open until the 26th of December. So if you haven’t entered, after reading this post i would appreciate you join the giveaway.

Here is my card —

Happy Holidays


This card was made using the supplies from the Simon Says Stamp November 2014 card kit. This card was lifted of the RetroSketches blog. I was going to enter this for their sketch challenge, however I messed upm the dates and when I was about to enter the card, I realized that the collection period already passed. If your interested, this was the sketch I used —

rs139


I filmed a video with the process of how I made the card. You can watch it below or on You Tube.


For a complete list of all the tools and products I used, please check the supply list below.

Thanks for watching. I’ll be back in a soon for Day 2 of the #12DaysofXmasCards

SUPPLY LIST:

I am experiencing technical issues with the supply list link up. Once it is fixed, I will add the supply list.


I Scream, You Scream, We All Scream

Hi everyone! I’m here today with a card for a friend of mine who loves ice cream. She is celebrating her birthday soon and I thought it was a great idea to give her an ice cream card.

Here is my card —

I Scream You ScreaM


I started this card with a standard size card with the fold on top from Neenah Solar White card stock. I selected a rainbow paper from Bo Bunny’s Lemonade Stand 6×6 paper pack and adhered it flush on to the base covering the entire front panel.

I used the left over rainbow paper and stamped scoops of ice cream from the Ice Dream stamp set on the different colors of the paper and fussy cut each one. I also stamped the cone and colored it in with Copic Markers. I arranged the scoops in rainbow order and stuck them to each other to look like they were stacked. I attached the entire ice cream cone on a piece of Neenah Solar White card stock cut with a flag banner. For the sentiment, I stamped the “I Scream” message from the same Ice Dream set in Memento Luxe Love Letter ink. For a glossy finish, I heat embossed it with clear embossing powder (my current favorite technique).

To finish the card,  I attached the flag banner on the card base. I also added some DIY enamel dots I made from perler beads.

That’s it for this card. For a list of all the products and tools I used, please refer to the supply list below.

Thanks for reading!

SUPPLY LIST:


Friendship Has Its Perks

Hi everyone!

I made this card a while back but failed to post it earlier so I decided to post it today. This card uses the supplies from the Simon Says Stamp October Card Kit.

Here is my card —

Friendship Has Its Perks

I started this card with a standard size card cut from Neenah Classic Cream card stock with the fold on top. I adhered a piece of patterned paper with the same size from Basic Grey’s Grand Bazaar 6×6 paper pad. For the top panel, I cut a 4 1/2 x 3 1/4 panel from the same Neenah Classic Cream card stock. I stamped the small coffee mug from the What’s Brewing set towards the right of the panel like they were stacked using the masking technique. I stamped it in a variety of inks from Simon Says Stamp which will be listed below in my supply list.

For the sentiment, I used the stamp from the same What’s Brewing set and stamped it vertically with Doll Pink ink from Simon Says Stamp.

To finish the card, I adhered some enamel dots from My Mind’s Eye and attached the panel on the card base using foam tape.

For a complete list of all the tools and products I used, please refer to the supply list below.

That’s it for this card. Thanks for reading.

SUPPLY LIST:

Sending You A Latte Thanks

Hi everyone! I’me here with a card for the Coffee Lovers Blog Hop hosted by Chaitali and Amy . I am addicted to coffee and I couldnt pass up the chance to participate in this hop.

15152067469_61f557acdf

Fortunately, the Simon Says card kit for October was coffee themed and it was the perfect oppurtunity to make a coffee themed card.

Here is my card —

Sending A Latte Thanks

I started this card with a standard size card with the fold on top from some Dark Chocolate card stock from Simon Says Stamp. To make the border, I cut 1/8 inch strips of patterned paper from Basic Grey’s Grand Bazaar 6×6 paper pad. I also inked a scrap piece of paper with versamark and embossed it with gold embossing powder from American Crafts. From the embossed paper, I cut more 1/8 inch strips for the border. I attached the strips on each edge of the card base to make the border frame.

For the focal image, I stamped the coffee mug from the What’s Brewing set from Simon Says Stamp in Versafine Onyx black ink on the yellow patterned paper from Basic Grey’s Grand Bazaar collection. I colored the small part of the coffee with a brown marker and also colored the inside of the mug with a yellow marker. I stamped the label “Java Nice Day” for the front of the mug. For the steam coming from the coffee, I heat embossed the image with gold embossing powder.

For the sentiment, I used the Latte Thanks sentiment and stamped it with VersaMark and heat embossed it with gold embossing powder.

That’s it for this card. Be sure to check out Chaitali’s blog for all the details for the blog hop! Happy National Day of Coffee!

For the complete list of the products I used, please check the supply list below.

Thanks for reading!

SUPPLY LIST: 

You’re Perfect In My Book – SSS September 2014 Card Kit

Hi everyone! I’m here with a card using supplies from the Simon Says Stamp September 2014 card kit. This kit has a book/reading theme. You can create shelves or a stack of books or really anything outside the box if you just imagine the possibilities.

Today I wanted to create a more safe card aligning with the theme of books.

Here is my card —

You're Perfect In My Book


I started this card with some Neenah Classic Creme card stock from the kit cut to a standard size landscape card. For the patterned paper piece ton top, I used papers from October Afternoon included in the kit and cut it with the Sizzix Fancy Labels #3. I also used the same Sizzix label die set but a smaller one to cut from the same Neenah cream paper to be nested on top of the patterned paper.

On the smaller label piece, I stamped the ledge/shelf with Cup O’Joe ink from Hero Arts. For the books, apple and plant, I stamped them in Cup O’Joe. Pale Tomato and Green Hills ink to match the patterned paper. For the sentiment, I used one from the set and stamped it with Pale Tomato ink from Hero Arts.

To finish the card, I used the woods dots from Teresa Collins and some pink enamel dots from My Mind’s Eye. Then I adhered the panel with some foam tape for added dimension.

That’s it for this card.

This card is an entry for the Simon Says Stamp Wednesday Challenge. The theme for the challenge is Anything Goes.

wednesdayblog-logo

wed-newchallenge-header

For a list of all the products I used, please check the supply list below.

Thanks for reading!

SUPPLY LIST: 

You’re So Cool – SSS August 2014 Card Kit

Hi everyone! I’m here today with another card for the Simon Says Stamp August 2014 Card Kit. I have been recently enjoying the 4 Bar card size so this is a 4 Bar card.

This card is an entry for the Simon Says Stamp Wednesday Challenge.

wednesdayblog-logo


wed-newchallenge-header


The theme for this challenge is ANYTHING GOES.


This card is also an entry for A Blog Named Hero‘s current challenge. The theme for this challenge is OMBRE.

challenge-50

Here is my card — (I’m sorry for the picture quality. It was a very gloomy day and I could not get a better picture.)

You're So Cool

I started with a panel of Tim Holtz Distress watercolor paper cut to 4 5/7 by 3 1/2. I used the smooth side and stamped the circle border from the Ice Cream Dreams repeatedly to create a background and I heat embossed it with white embossing powder. To create the ombre look, I used distress inks in Picked Raspberry and Spiced Marmalade from Tim Holtz. I started on top with the Picked Raspberry and finished with Spiced Marmalade at the bottom. I made sure to blend both the colors at the center for a red orange color.

For the focal image, I stamped the 3 ice cream images from the set and colored them in with a variety of alcohol markers. After cutting them out, I attached it to a Sizzix Border Frame. Before adhering the frame, I distressed the edges with the Tim Holtz distress ink in Antique Linen.

For the sentiment, I stamped the You’re So Cool sentiment with black pigment ink and then heat embossed with clear embossing powder. I cut the sentiment  into a thin strip and made banner edges on each end. I also distressed the edged with Antique Linen distress ink before adhering it to the card with foam tape.

I placed the front panel on a 4 Bar card base made from Neenah Solar White card stock.

That’s it for this card.

For a list of  products I used for this card, please check out the supply list below.

Thanks for reading!

SUPPLY LIST: 

I Love You More Than Ice Cream, That’s A Lot – SSS August 2014 Card Kit

Hi everyone! Im here today with a card for the RetroSketches Challenge using supplies from the Simon Says Stamp August Card Kit.

Here is the sketch for this challenge —

rs128

Here is my card —

I Love You More Than IceCream

I started this card with some Neenah dessert Storm card stock cut to  a standard size with the fold on top. I cut a piece of patterned paper from Bo Bunny that was included in the kit. I attached it to the front of the card tilted. For the diamond, I cut a die border from Sizzix on some brown paper.

For the focal point, I cut a circle from the Sizzix Circle Framelits and attached the variety of ice cream. I colored the sweet treats using Spectrum Noir markers. I attached the circle to the center of the card. For the sentiment, I heat embossed on gold embossing powder.

To finish the card, I added some sequins from Pretty Pink Posh and added glitter accents to the ice cream.

That’s it for this this card. Thanks for reading.


Hang In There

Hi everyone. Today’s card is another share from the SSS July 2014 card kit. I’ve really had a lot of fun with this kit and I am very excited to move on to the August kit.

This card is an entry for the Simon Says Stamp Wednesday Challenge. The challenge for this week is ANYTHING GOES.

wednesdayblog-logo

wed-newchallenge-header

This is also an entry for A Blog Named Hero‘s most recent challenge. The challenge theme is Die A Little.

challenge-49

Here is my card —

Hang In There

I started this card with 4 3/4 by 4 1/4 card from Neenah Solar White card stock. I adhered a piece of patterned paper from Pink Paislee over the entire front of the card. The front panel, I cut a piece measuring  1/4 x 3 3/4 from more Neenah Solar White card stock. I die cut a few pieces of the hanger die cut from the Thanks For Your Support coordinating die set from SSS. I stuck each hanger together and for the top most piece, I covered it in VersaMark and heat embossed it with silver embossing powder for American Crafts. That made it look like a steel/metal hanger which was the look I was going for.

For the envelopes, I stamped the smallest envelope from the Happy Thoughts stamp set on different patterns from Pink Paislee. I attached the envelopes on the hanger with blue twine from Maya Road. For the sentiment, I used Milo’s ABC from Lawn Fawn in Memento Paris Dusk ink and a sentiment from the Love This set using Lipstick Red ink. I rounded the corners of the front panel and adhered it with foam tape.

That’s it for this card. For a list of the tools and supplies I used on the card, please check the supply list below.

Thanks for reading.

Simon Says Stamp July 2014 Card Kit Completed

Hi everyone! I’m here today to share a few cards that I made with the Simon Says Stamp July 2014 Card Kit. I made a total of 11 cards for this kit. I already shared 3 and I will share another 3 today. I have a 7th card that I will share tomorrow. As for the balance 4 cards, they were mostly inspirations from the inspiration sheet we received with the card kit so I won’t be sharing those anymore since they were mostly CASE cards.

The Simon Says Stamp Card Kit is an awesome deal. It is a monthly subscription of card making supplies with a theme each month. To purchase each kit is 24.95 on its own. If you decide to subscribe it will be 19.95 which is reasonable price since you are getting a full size stamp set every month. I love receiving the kit each month because it definitely helps kick start my creativity.

Now for the first card —

Thinking of You Chevron

I started this card with a standard size Neenah Solar White card stock with the fold on top. For the chevron design, I am using my favorite technique which Jennifer McGuire demonstrated here. I love chevrons and when I saw Jennifer’s tutorial, I knew I would be doing this all the time. For the chevron pattern, I used the patterned papers from Pink Paislee that was included in the kit. Instead of using the chevron stripes as a whole sheet, I decided to cut each strip so I could place them randomly on the card. I ran the stripes on my Xyron Sticker Maker to make it easier to stick.

For the sentiment, I used the sentiment from the stamp set included in the kit. I stamped it using Lipstick Red ink from SSS. I also randomly stamped some of the hearts around the sentiment the same red ink. To finish the card, I accented the hearts with some Clear Wink of Stella pen and locked the shine with some Glossy Accents.

Here is the second card —

Thinking Of You

For this card, I was inspired by a card I saw at my local grocery store. I forgot to take a picture but it had stripes printed on the background so I knew I wanted to use strips of paper using the Pen Pal collection. I chose a few patterns and cut them into 1/4 inch strips. I started sticking the strips at the center and worked my way to each side. I decided to  arrange them randomly with different heights. I used Neenah Desert Storm as my main card base. The card is standard size with the fold on  top.

For the main element, I cut a circle using the Sizzix Circle Framelits set from the same kraft card stock. I embellished it with the typewriter, heart and thought bubble puffy stickers from the Pen Pal collection from Pink Paislee.

And here is the final card —

Hello Circles

I started this card with some Neenah Solar White card stock cut to standard size card. Using the patterned papers, I cut 1 inch circles and adhered in 2 lines on the front of the card. For the sentiment, I used the round hello greeting from the same set. I embossed it on Blueberry card stock from Bazzill using the AC Zing Gold Metallic embossing powder. I stuck the other circles straight on to the card stock but for the Hello sentiment, I adhered it using foam squares for added dimension.

I had some left over strips from the previous card, so I cut one side at a diagonal and adhered it to the card. To finish, I rounded the bottom corners.

That’s it for this post and card kit. For more information on the tools and supplies I used for the cards, please check the supply list below.

Thanks for reading!